Montauk Beach House (Part 2)
Montauk Beach House: Construction and Architectural Details
Click here to read Part 1.
We didn’t start from scratch. The house was already there. Odd-shaped. Crooked. Full of quirks. But it had a soul, and that’s what we loved about it. The goal wasn’t to flatten it out and whitebox it, the goal was to make it livable, functional, and better built; without losing what made it different.
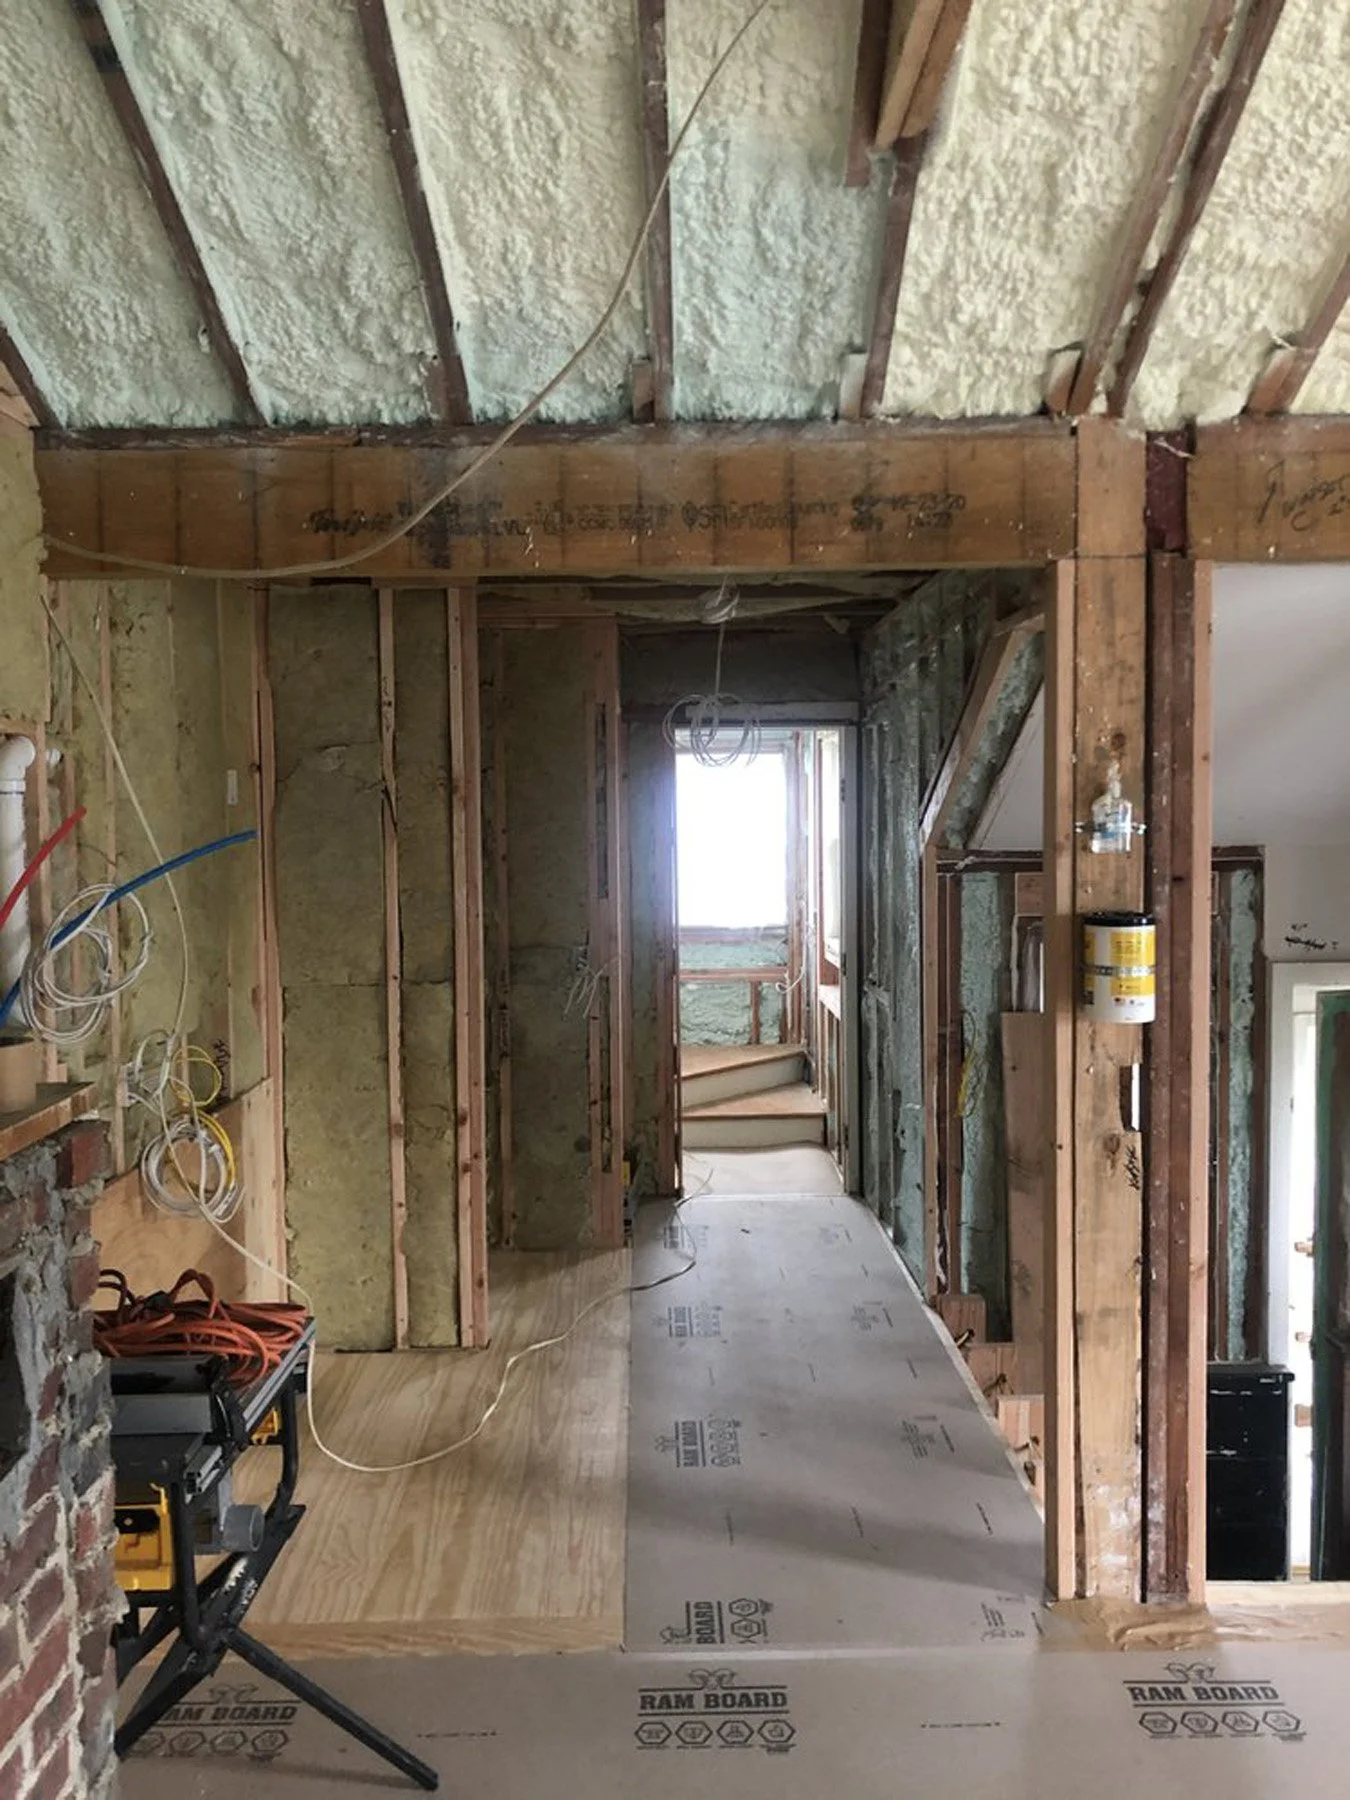
The Existing Conditions
This house sits in Montauk. Right on the edge of wetland and setback restrictions; tucked into a quiet enclave just steps from the beach with its iconic waves. That meant we couldn’t expand the footprint. Every inch had to work harder. We kept the original envelope but rethought everything inside it, much like a ship.
Exterior Work
We replaced all the windows and doors. Everything is new, energy-efficient, and properly flashed. We expanded their size to maximize the amount of light being let into the space.
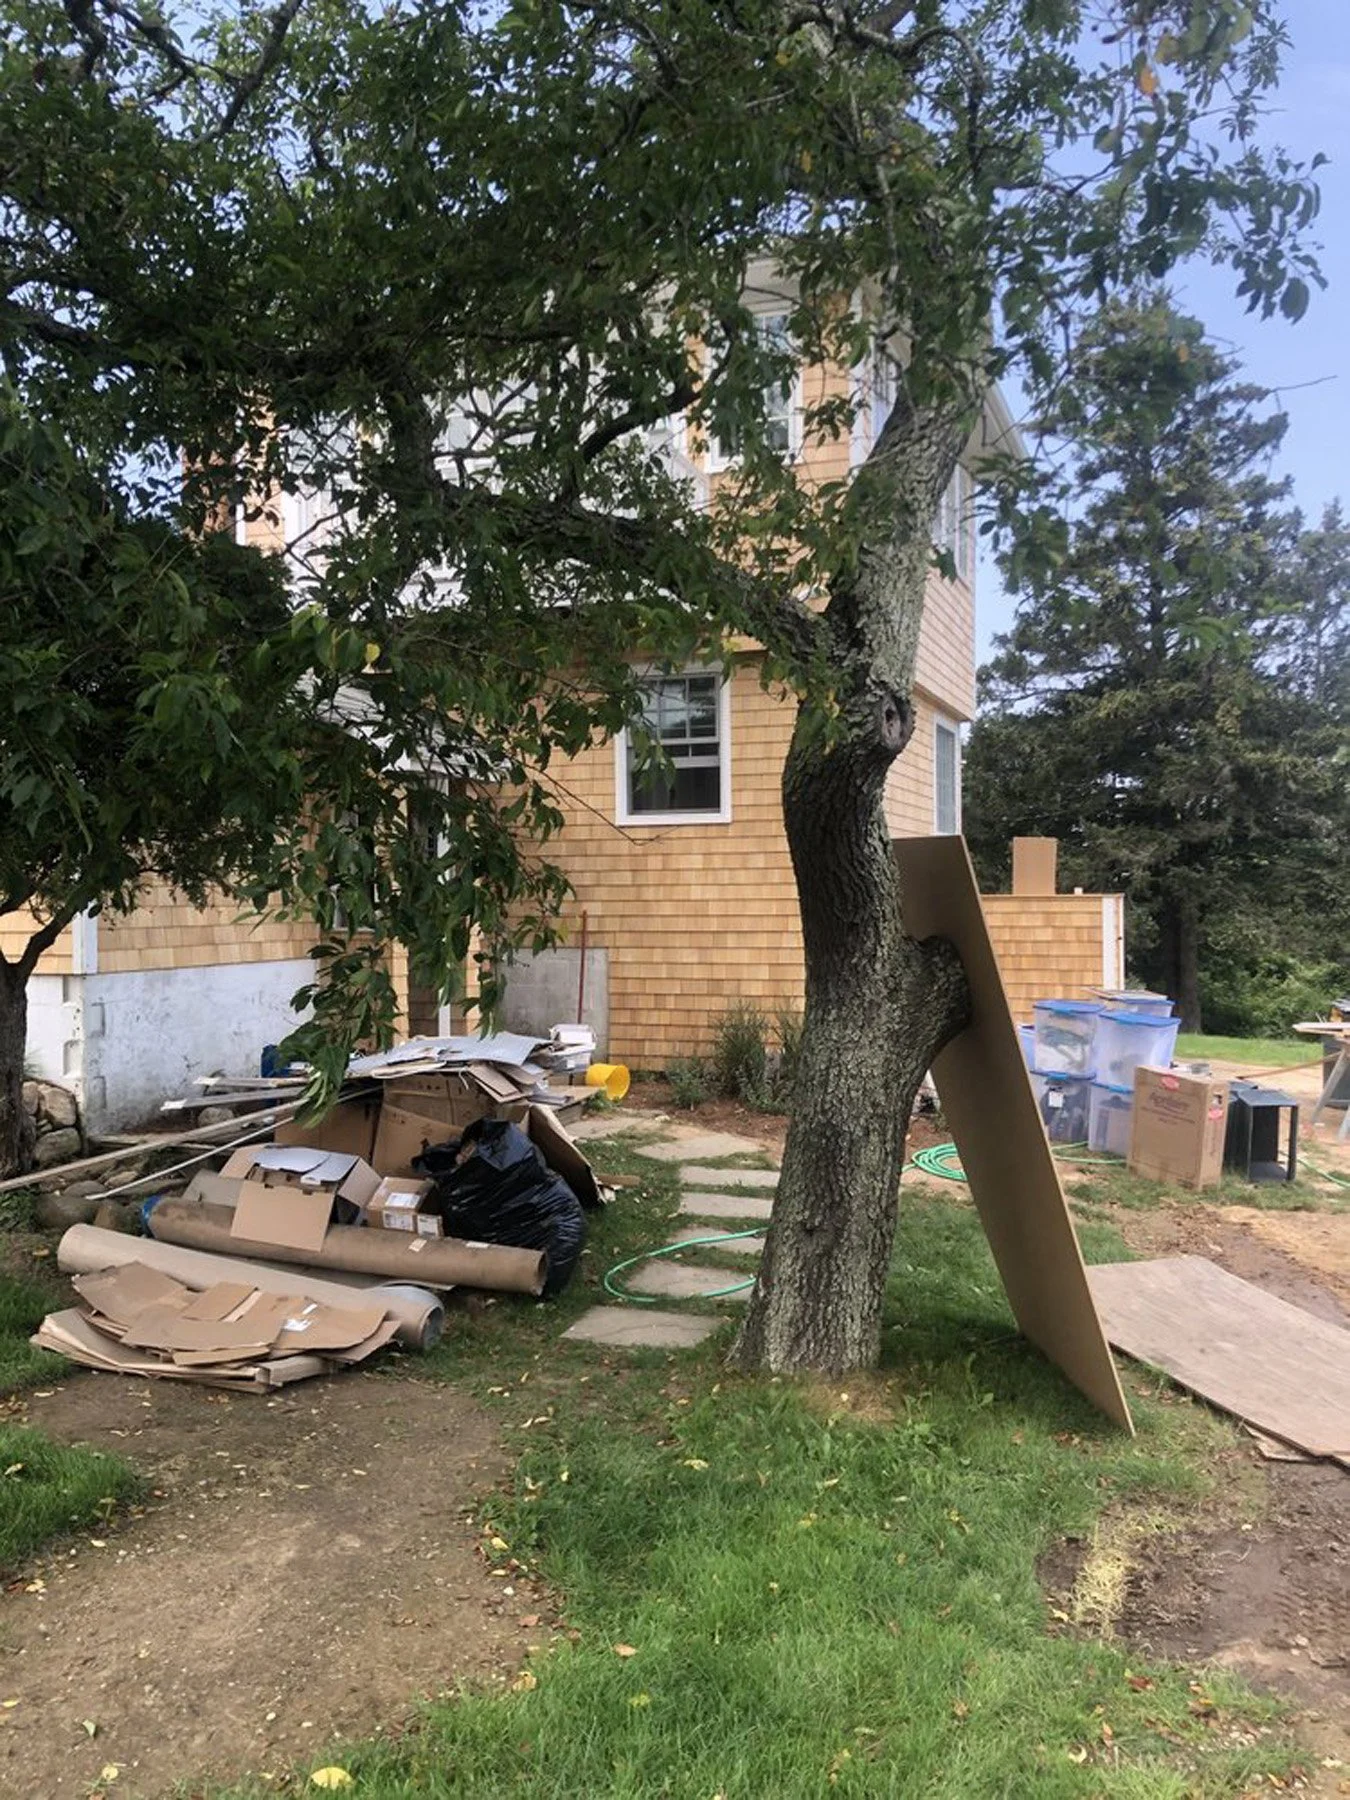
We reshingled the roof and added new siding. It holds up to salt air and weather and will look better with each new season.
We kept the original gable details, including the windows that gave the house its name.
The house now sits cleaner and tighter on the site. No weird overhangs. No patch jobs. But perfectly buttoned up for a new lease on life.
Interior Architecture
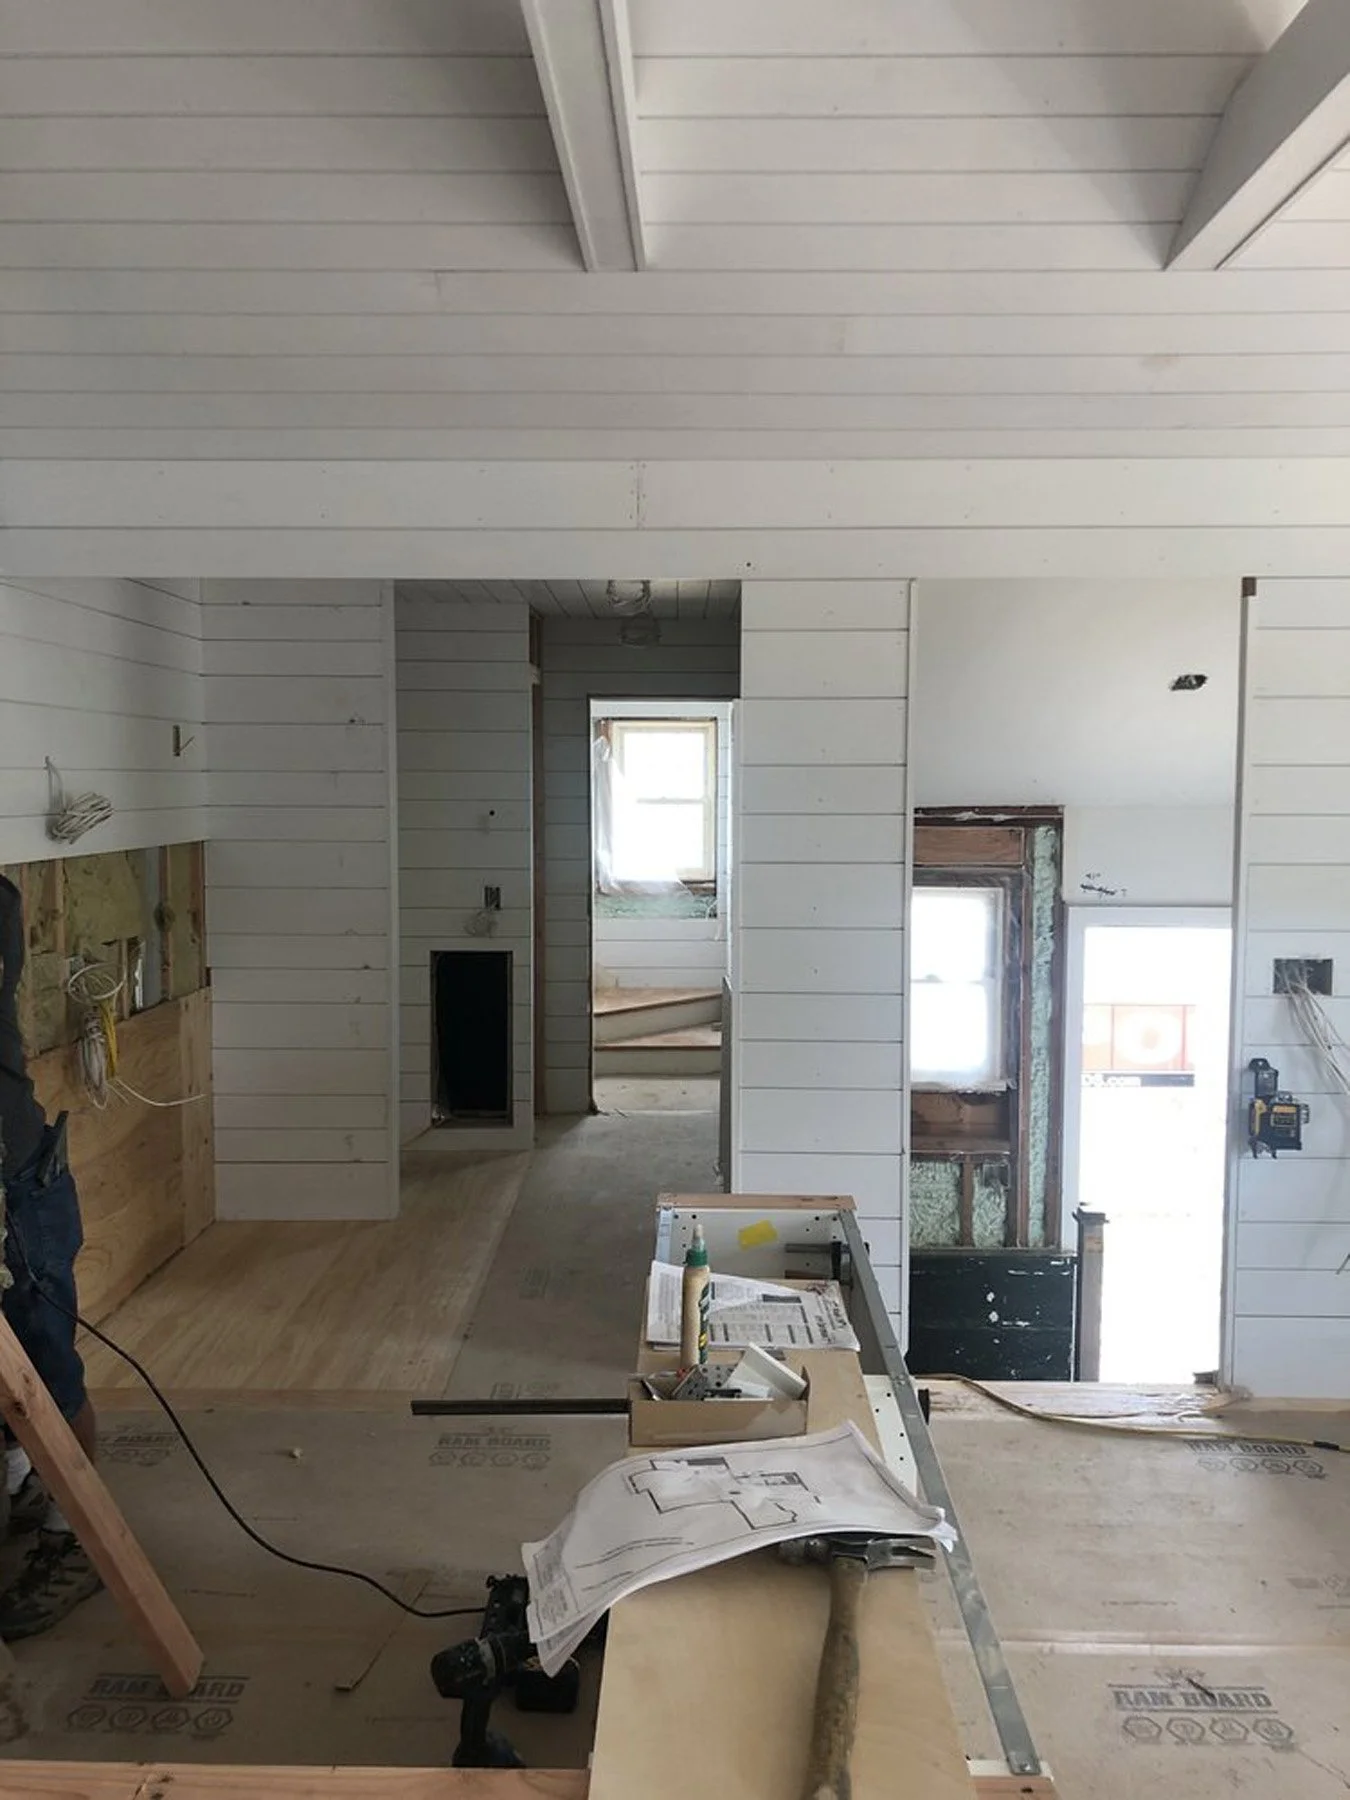
We stripped the interior down to the studs. Nothing was square. We worked with it. We kept all the details we could, carefully setting them aside to be re-introduced to the project.
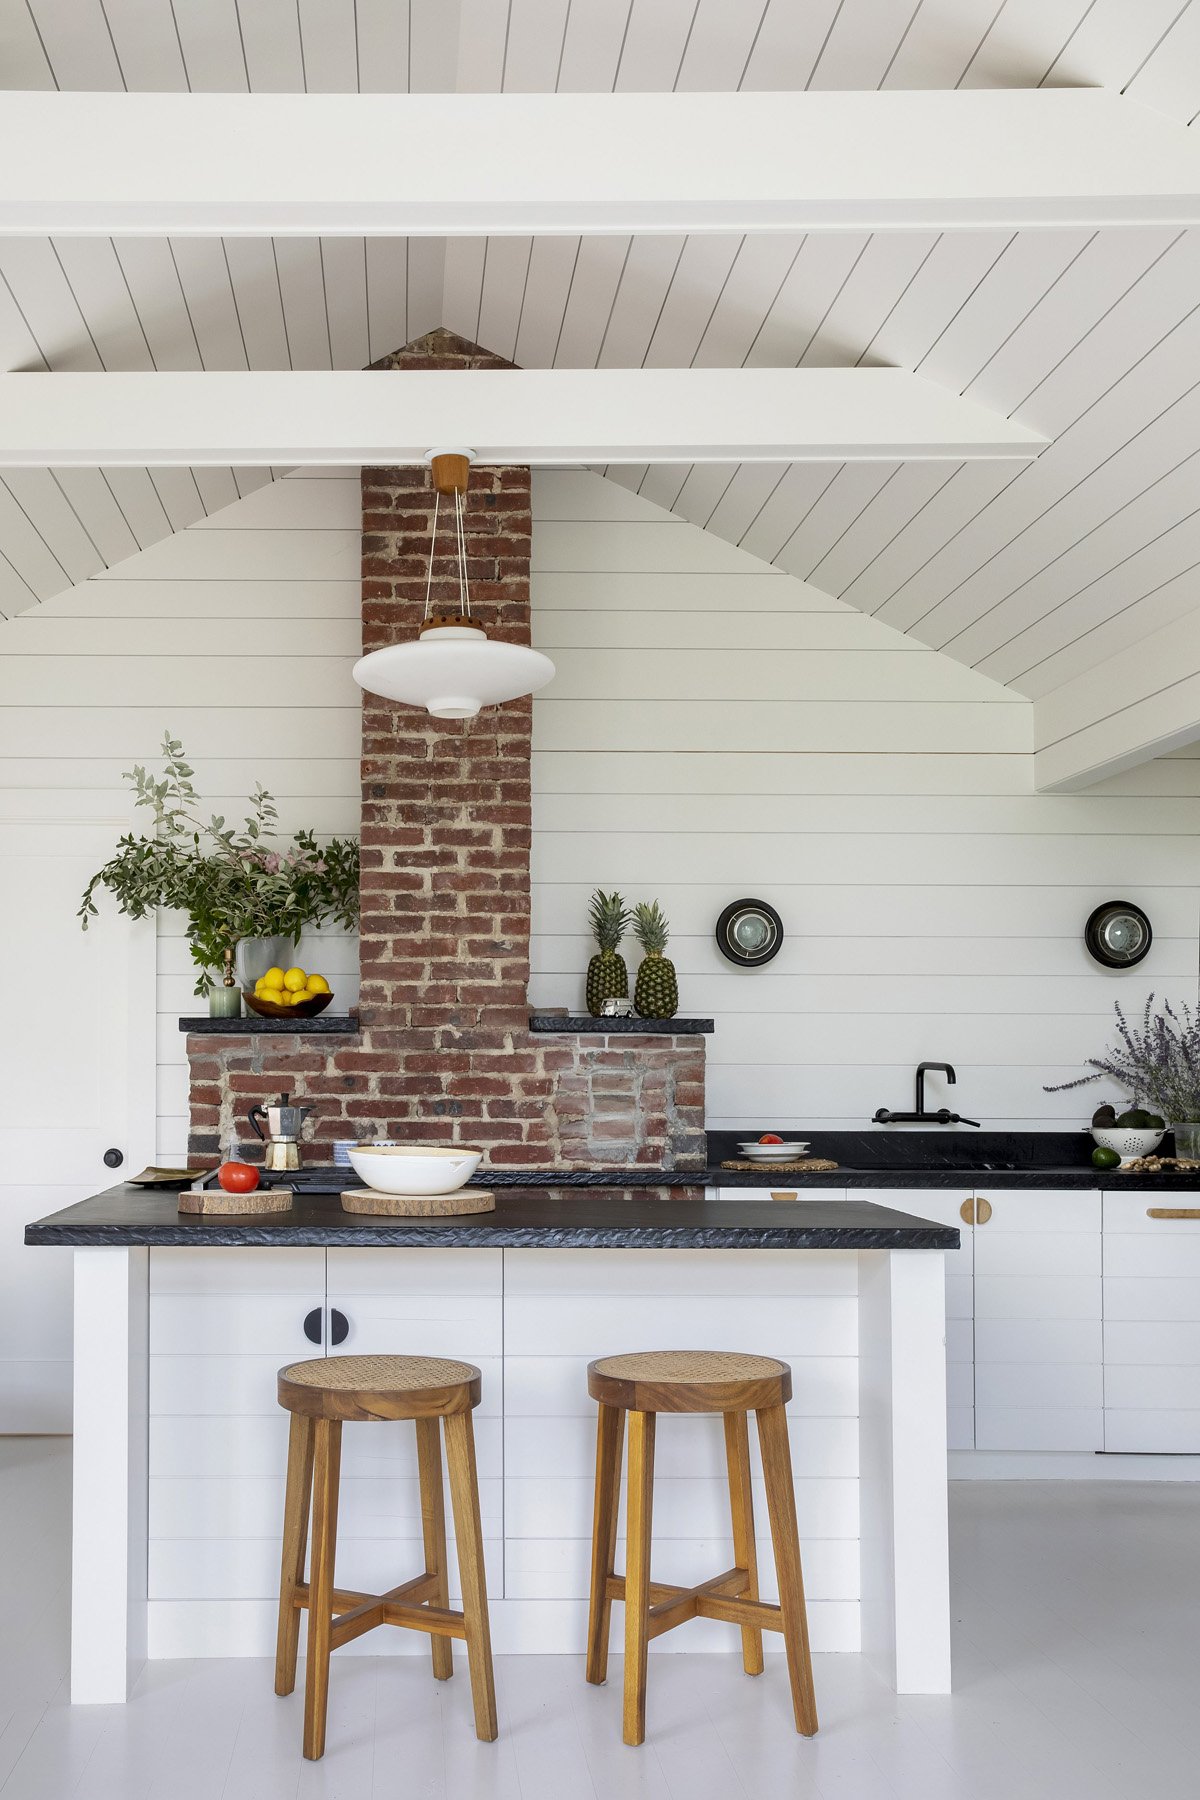
We used trim and paneling to organize walls and define each zone. Using the panelling as our surface detailing as well.
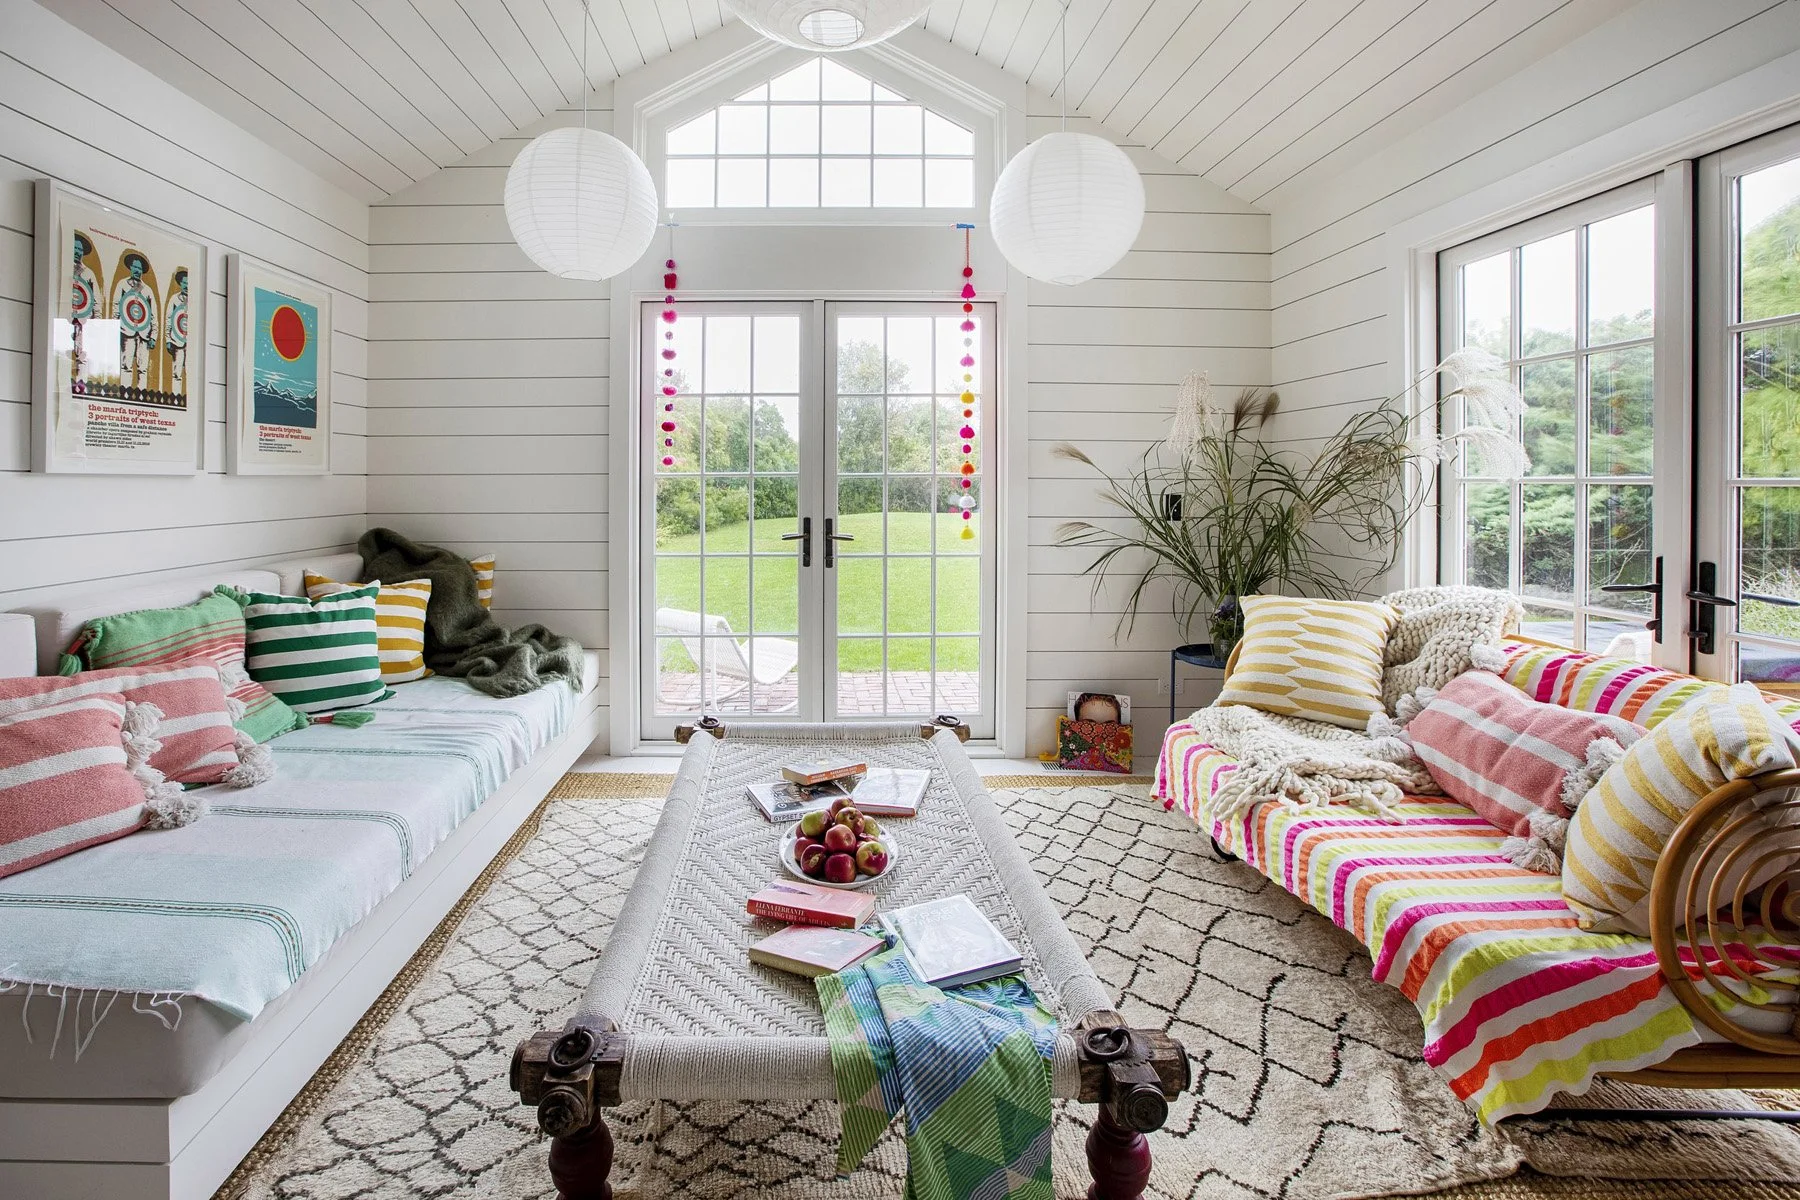
Built-in furniture replaced a lot of stand-alone pieces. It saves space and feels intentional. The built-in sofa in the living room doubles as a single-bed for those late night parties.
Where we couldn’t save it, the original flooring was removed. We used simple, durable materials throughout to help tie in the old and new; and to provide an approachable casualness to the space.
We ran updated electrical and plumbing. Everything meets code. Everything is concealed.
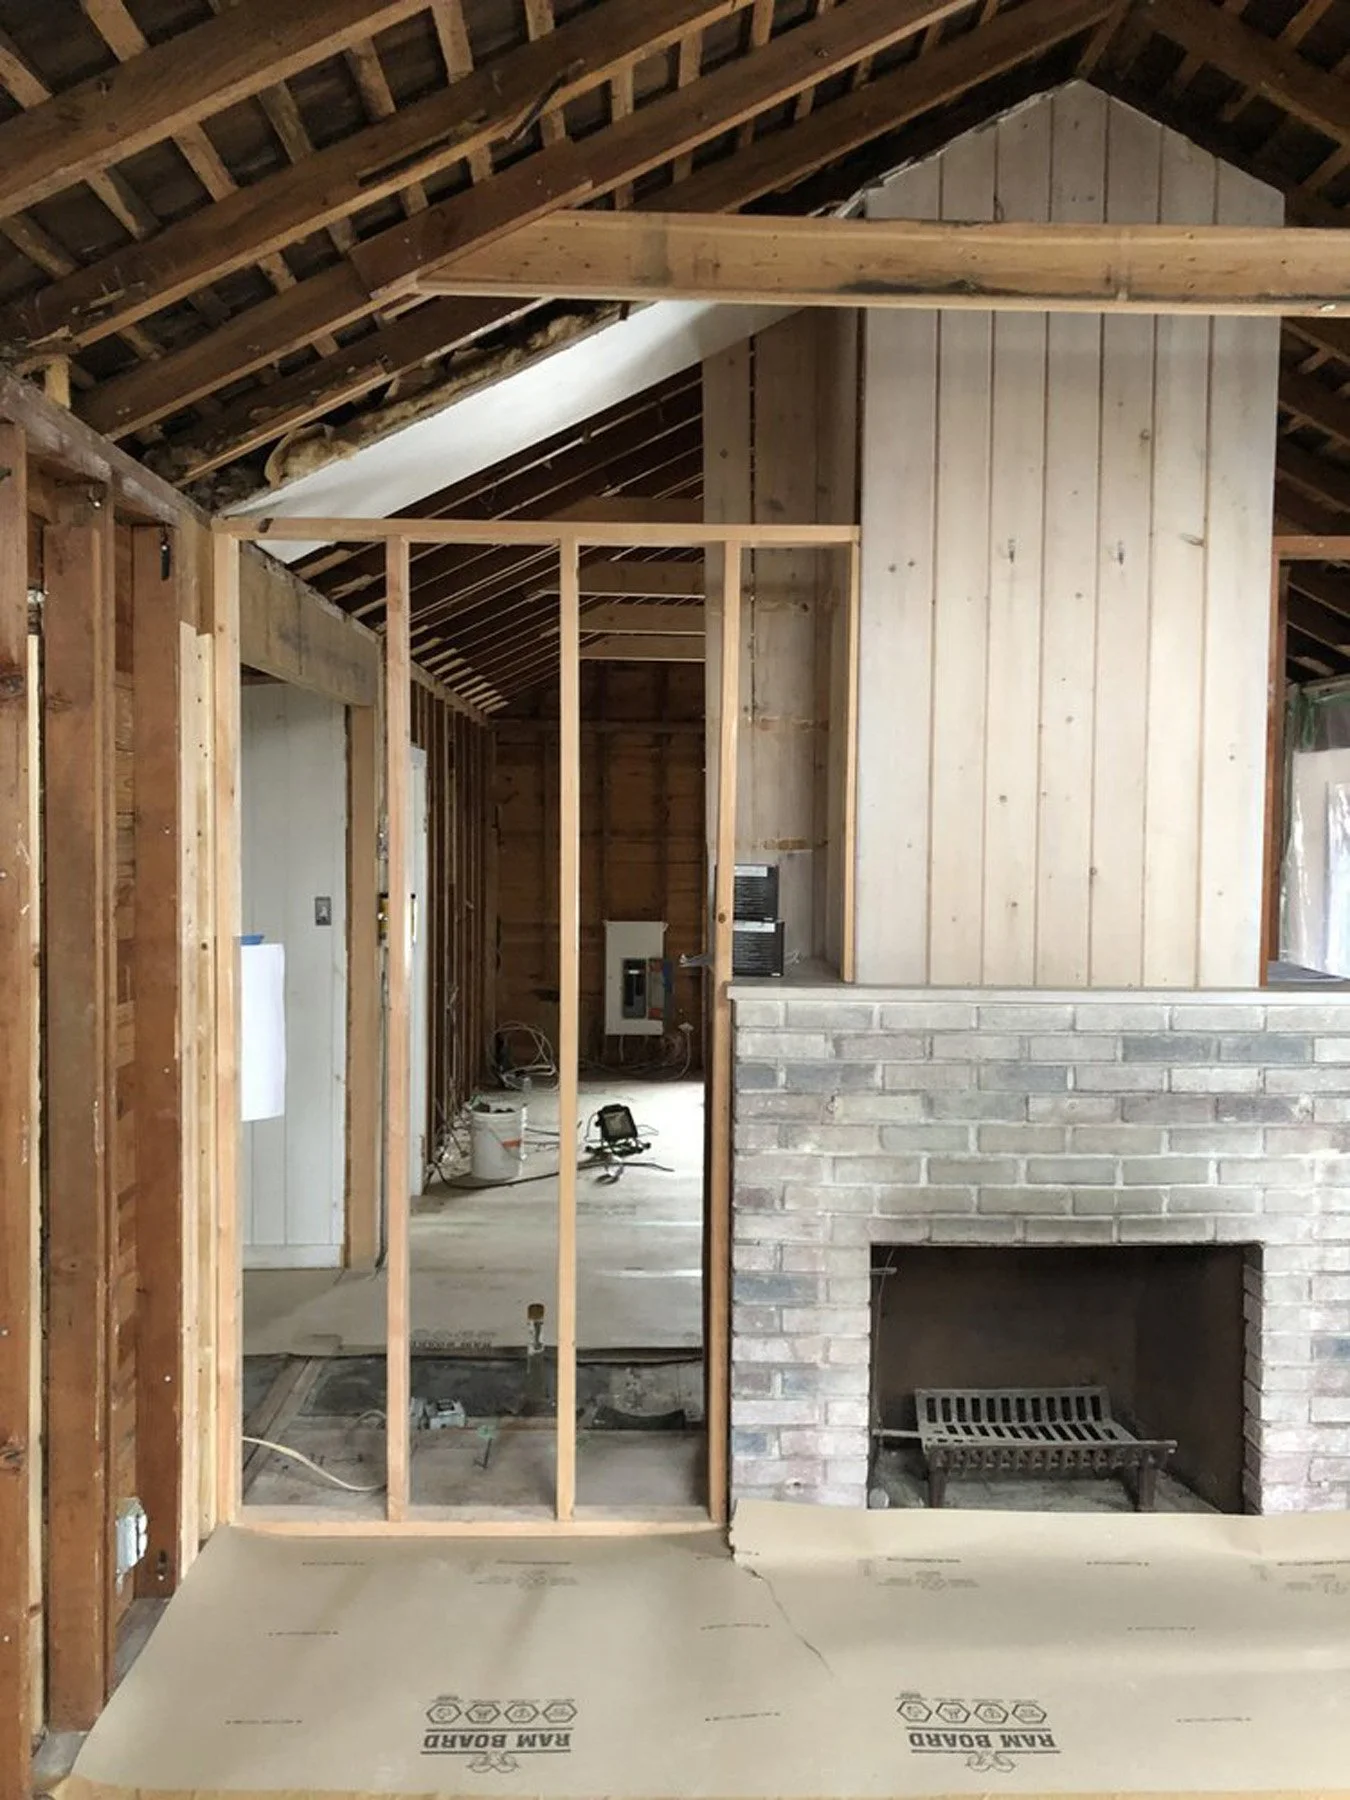
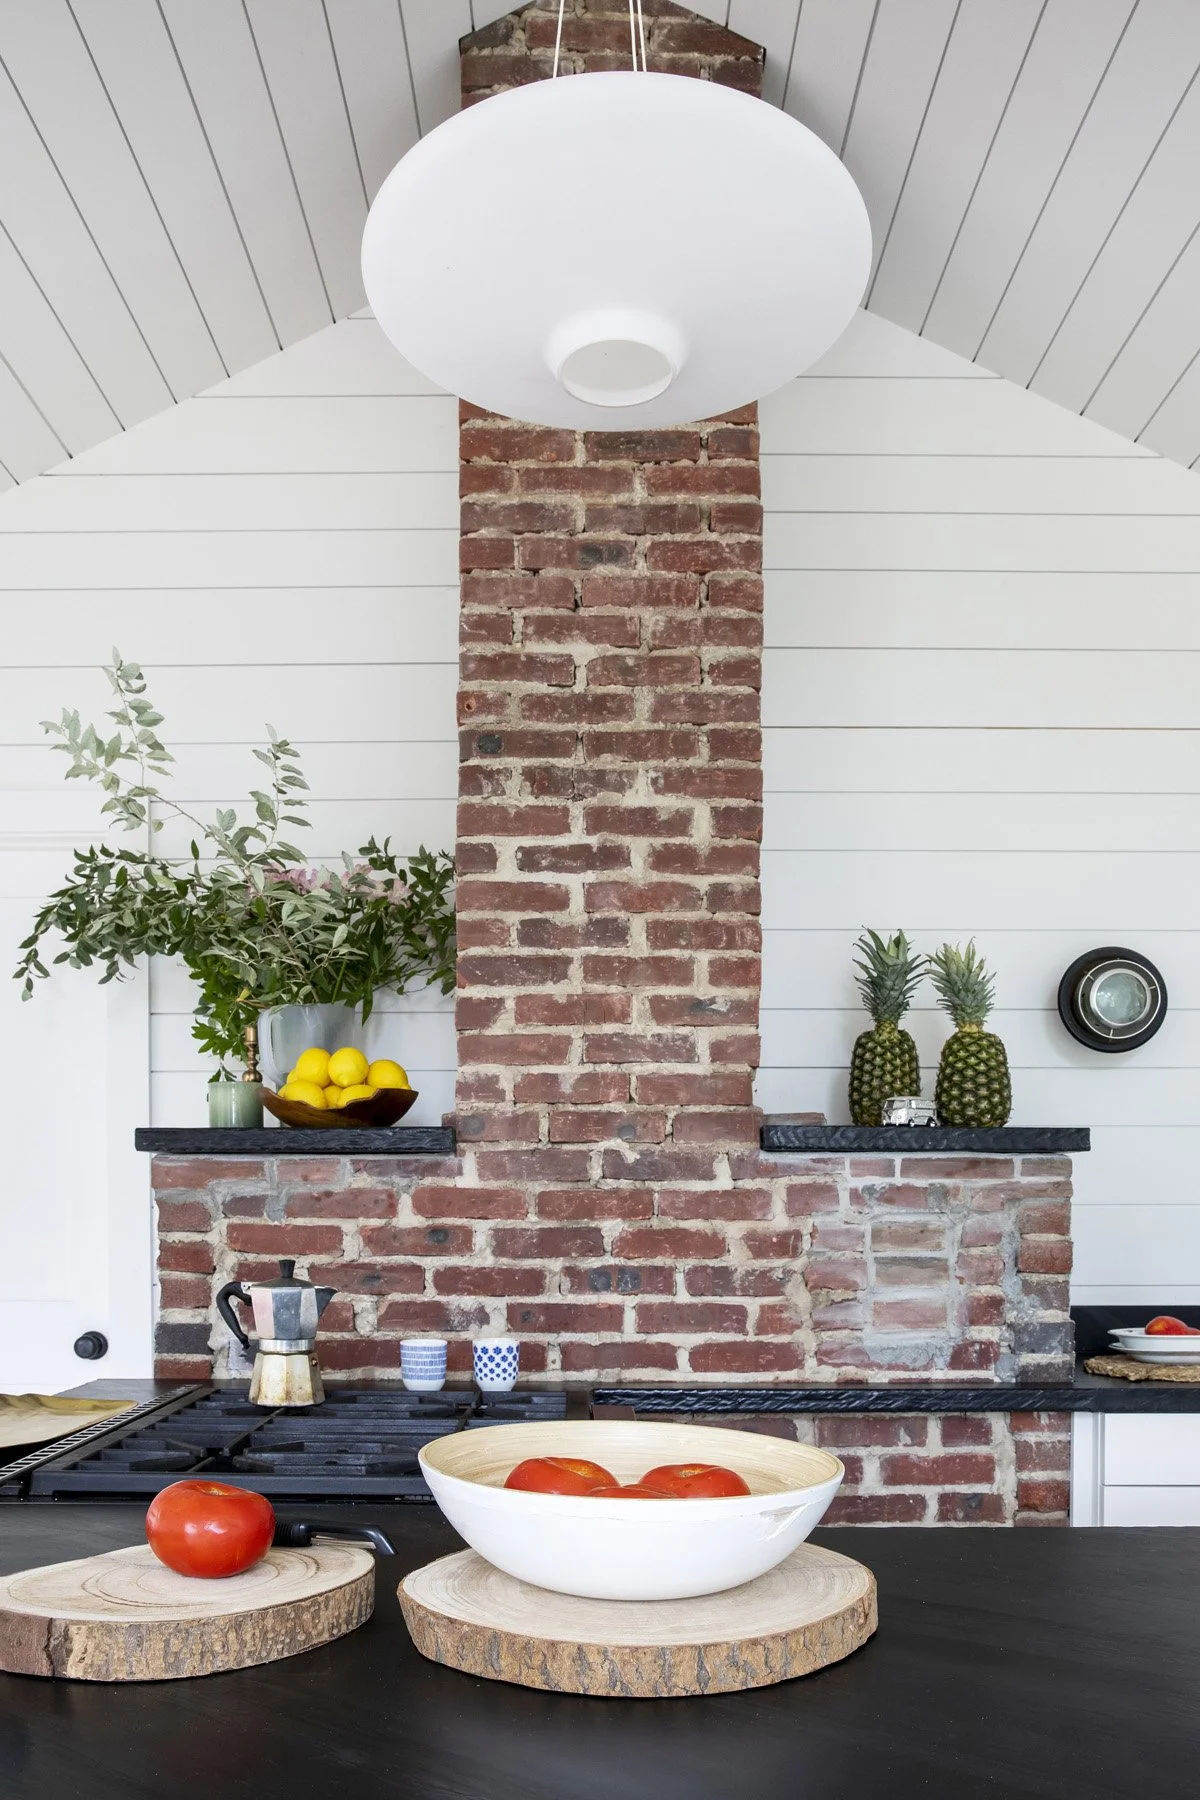
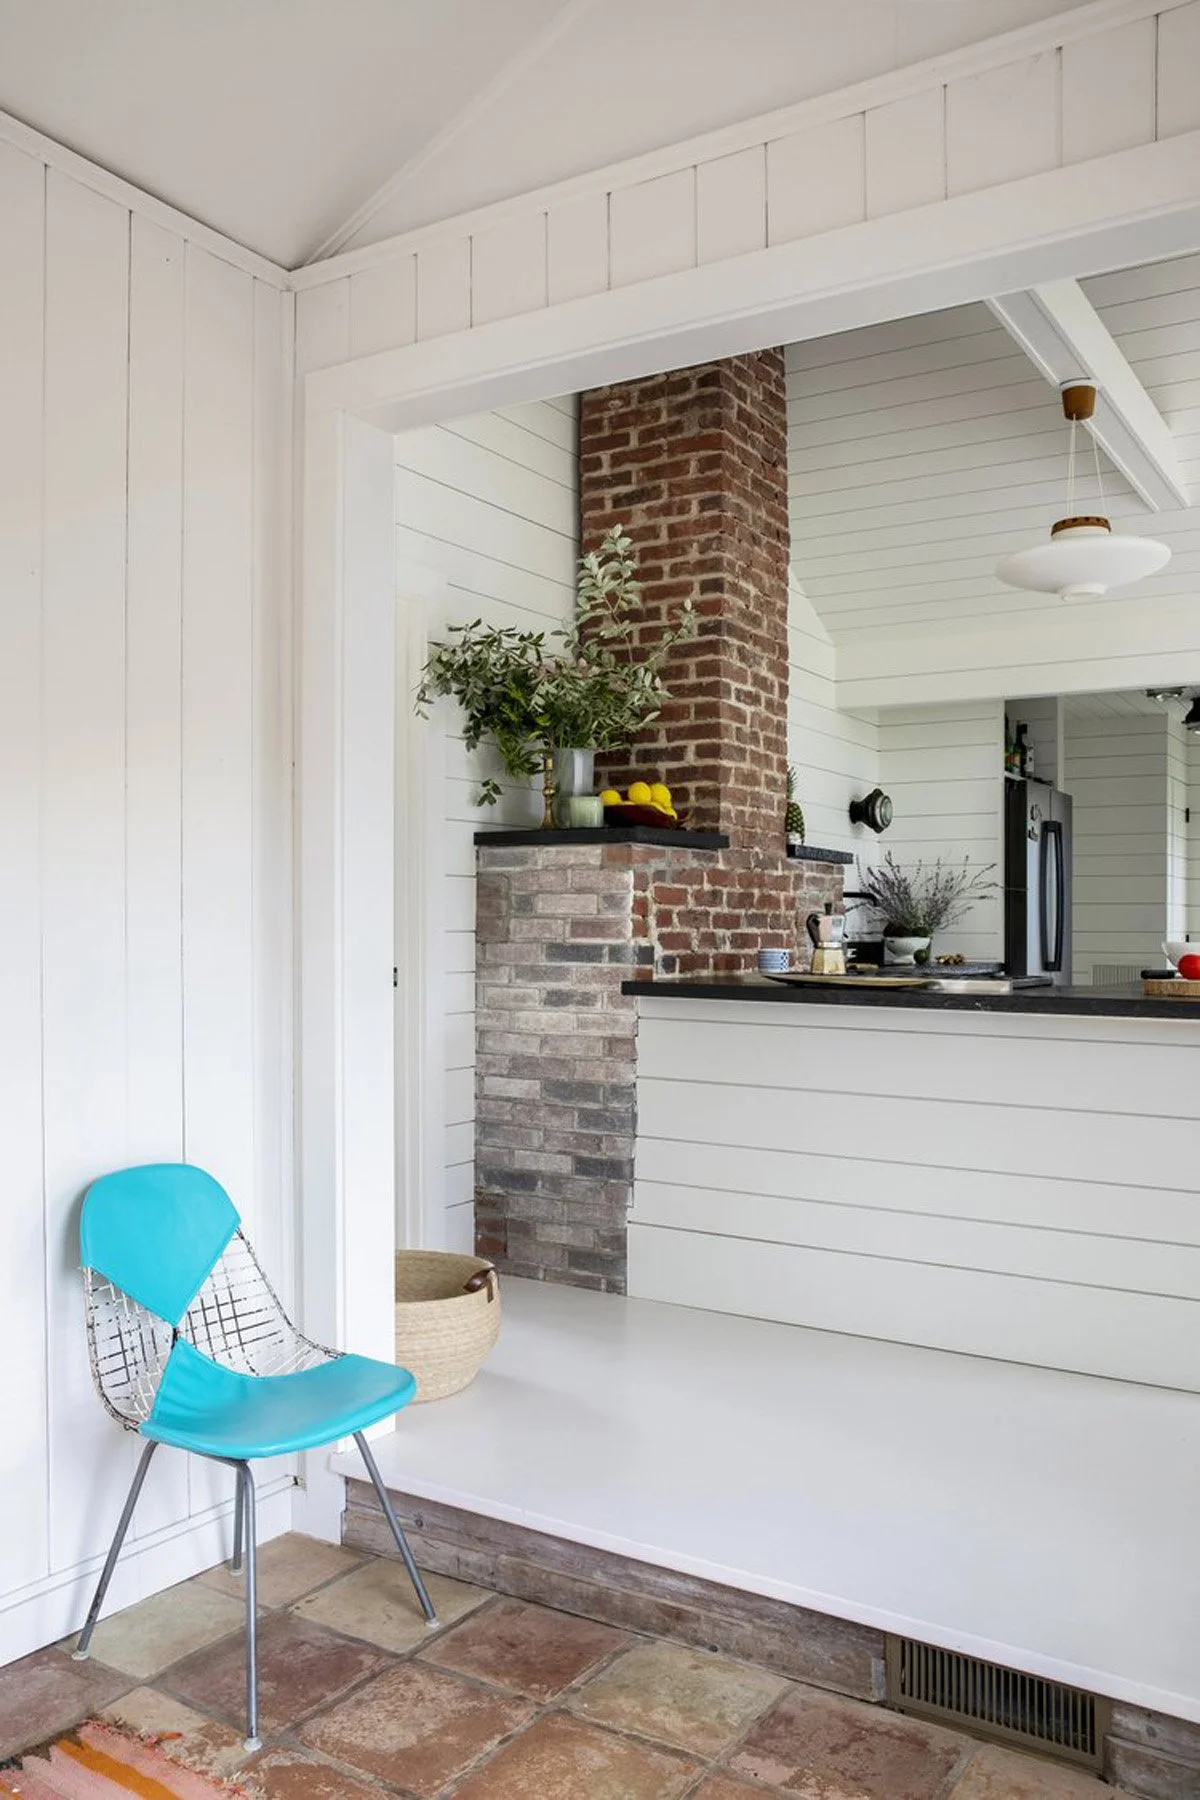
The existing fireplace brick was exposed and cleaned up; we built the kitchen around this stack to give us some additional space in the kitchen and to bring the texture of the brick out to be a star.
Kitchen and Bath
The kitchen countertop is a chiseled slate. It was chosen to feel site-specific, like it was taken from the property. The chiseled edge helps to bring that un-perfection to the kitchen area. The slate adds a perfect earthiness that is understated and appropriate.
We used the panelling of the walls to cover the face of the kitchen cabinets; causing them to recede into the background and help maintain the airiness of the living room. No unnecessary hardware. No ornamentation.
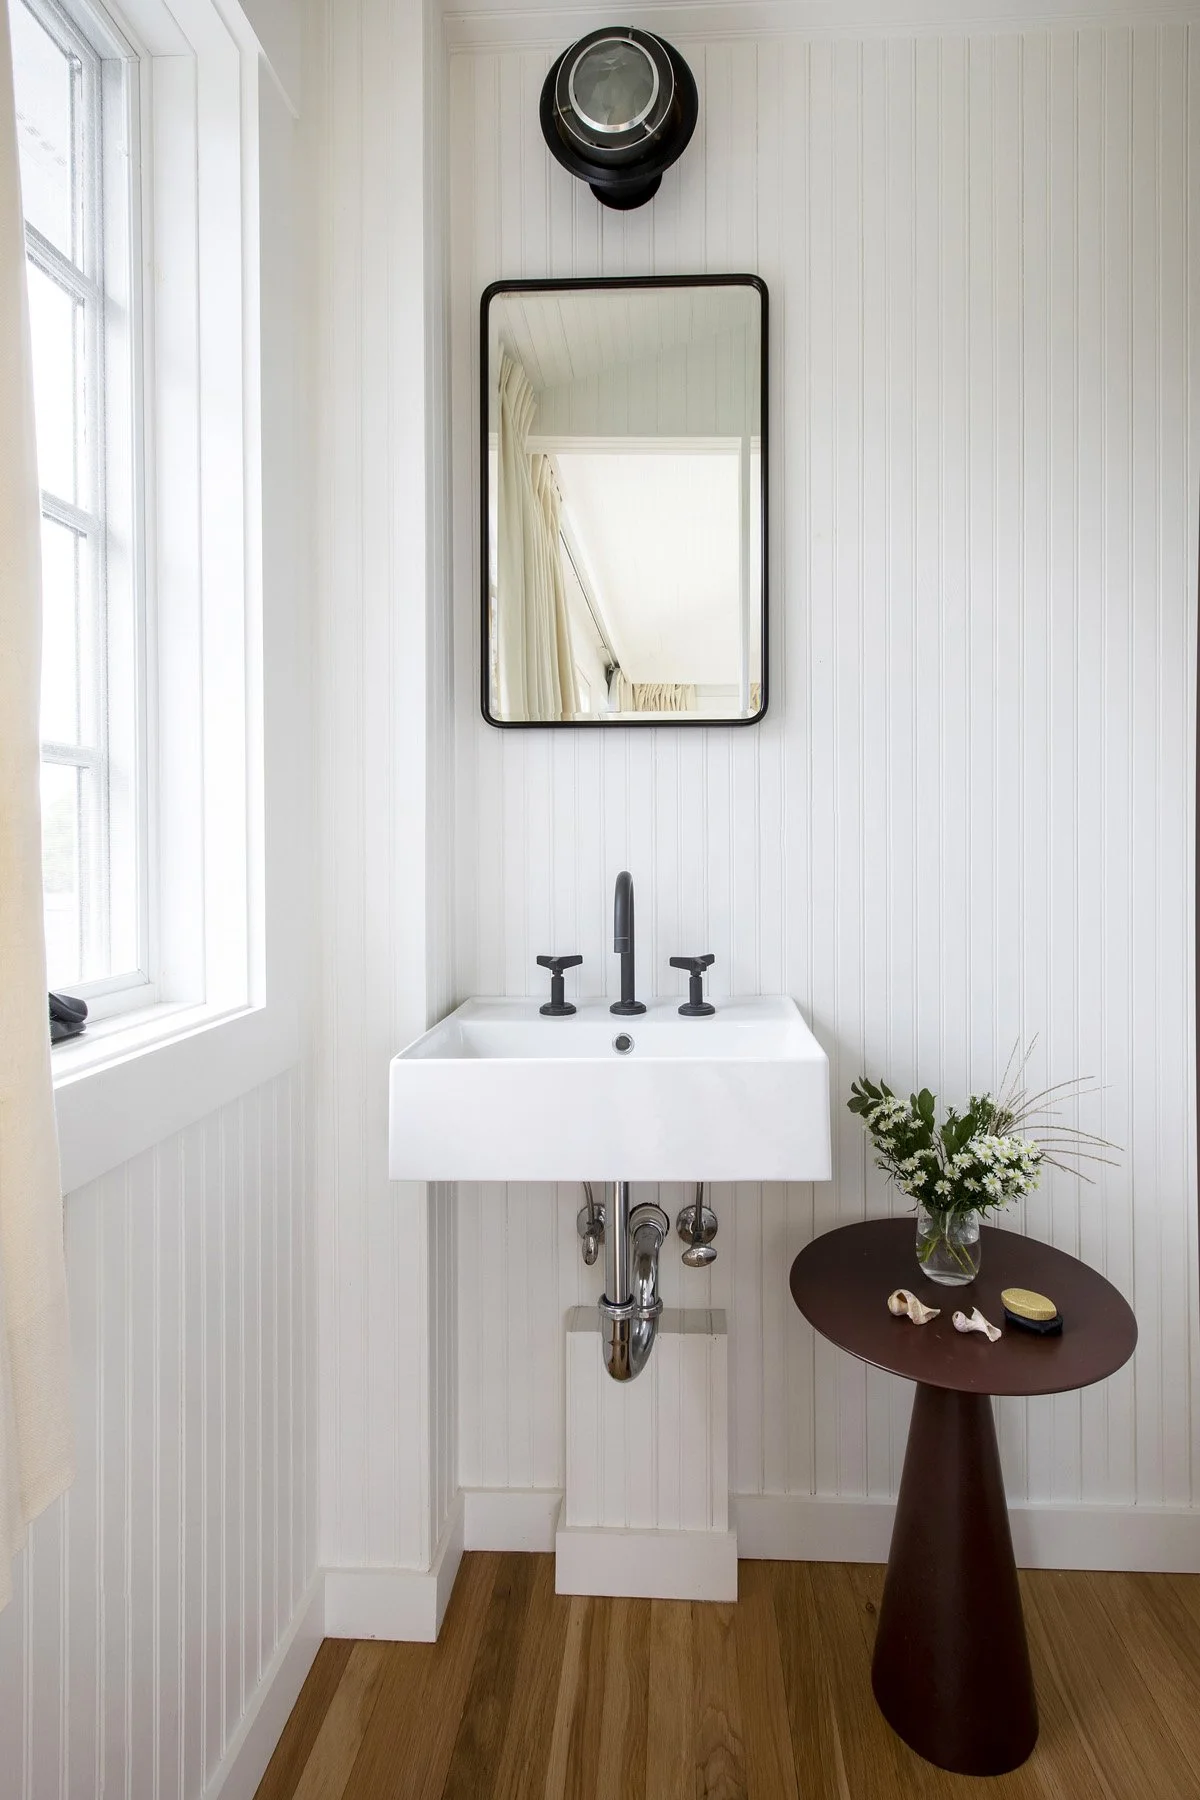
Bathroom was streamlined to include a soaking tub (large enough for two) to hop into after a day of surfing - situated to stare out the window and catch the sunset.
The Bathroom included paneling details of its own by incorporating reeded oak panels to help bring some detail and personality to the space; the sink top is a Norwegian Pink marble with integrated sink for the perfect vintage pink hit
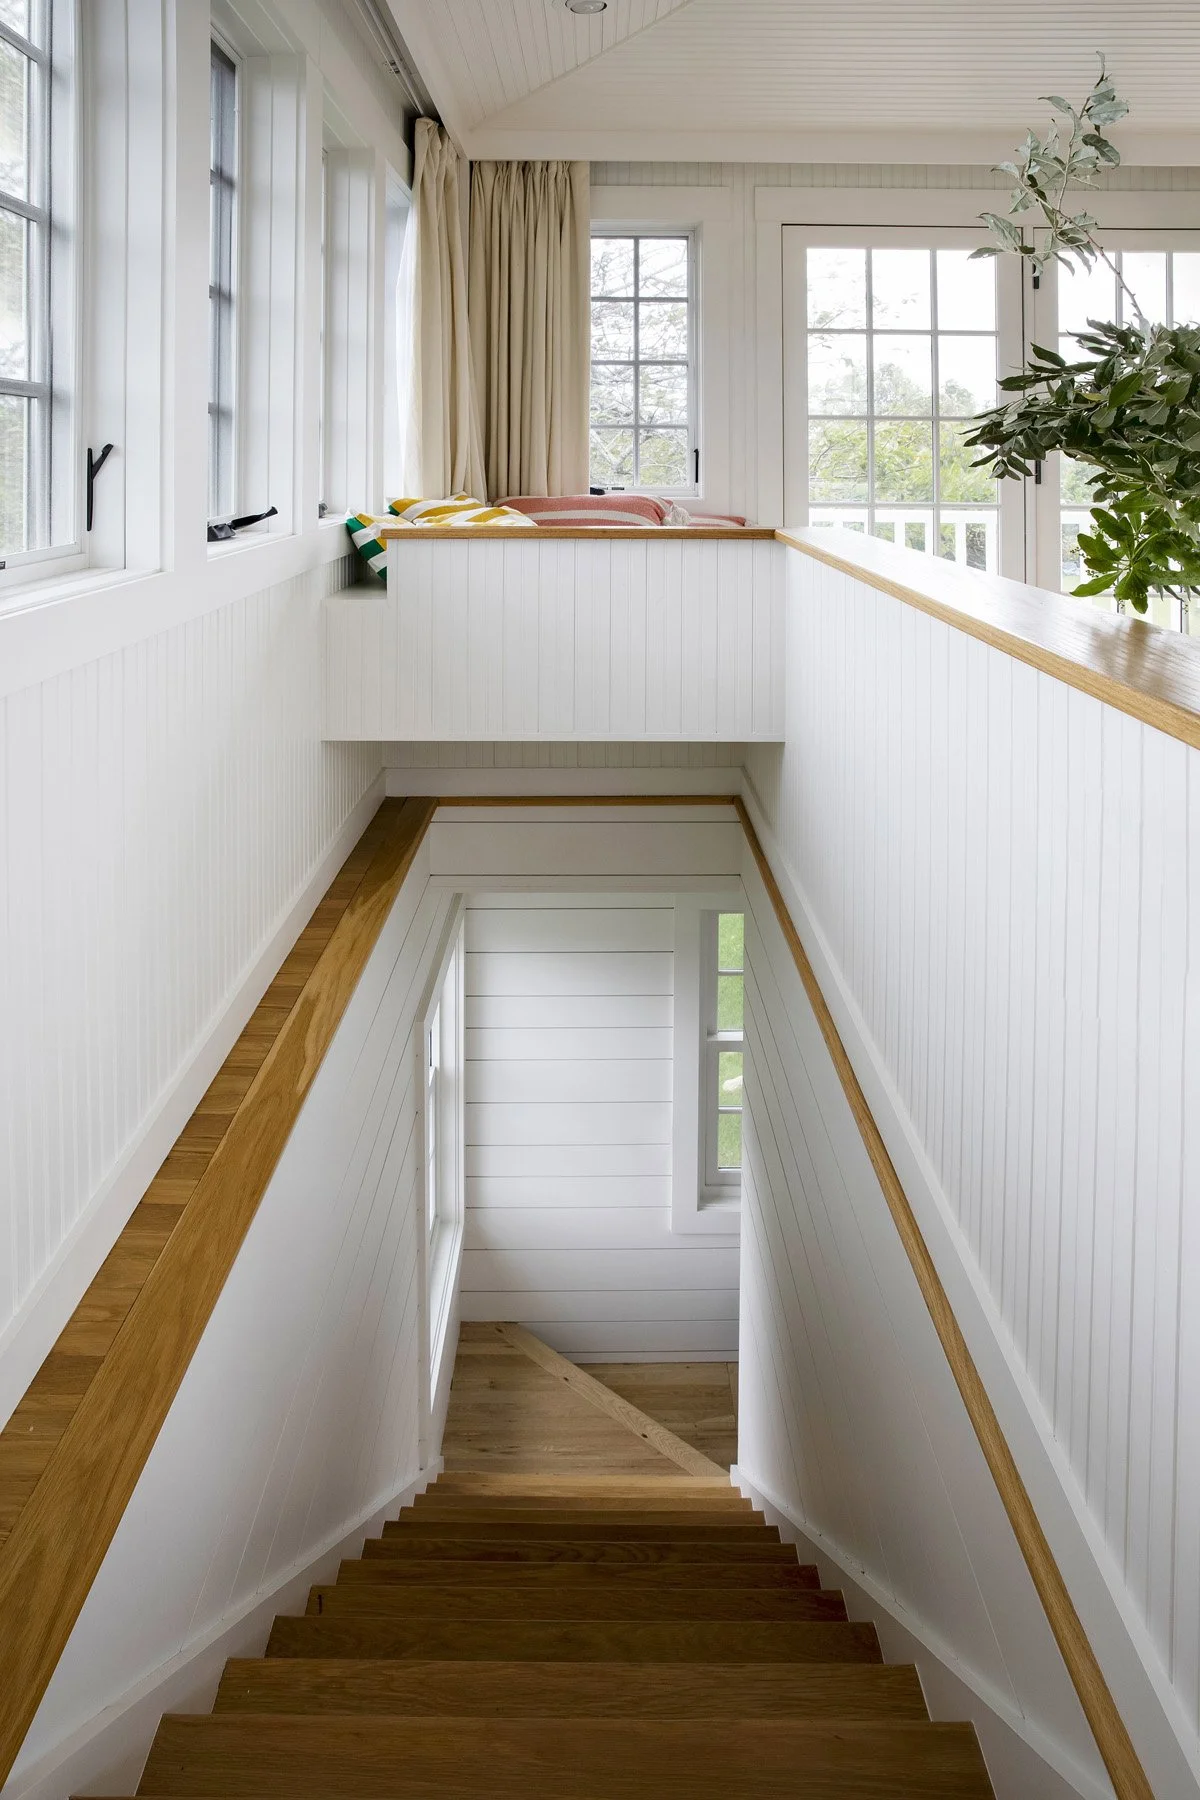
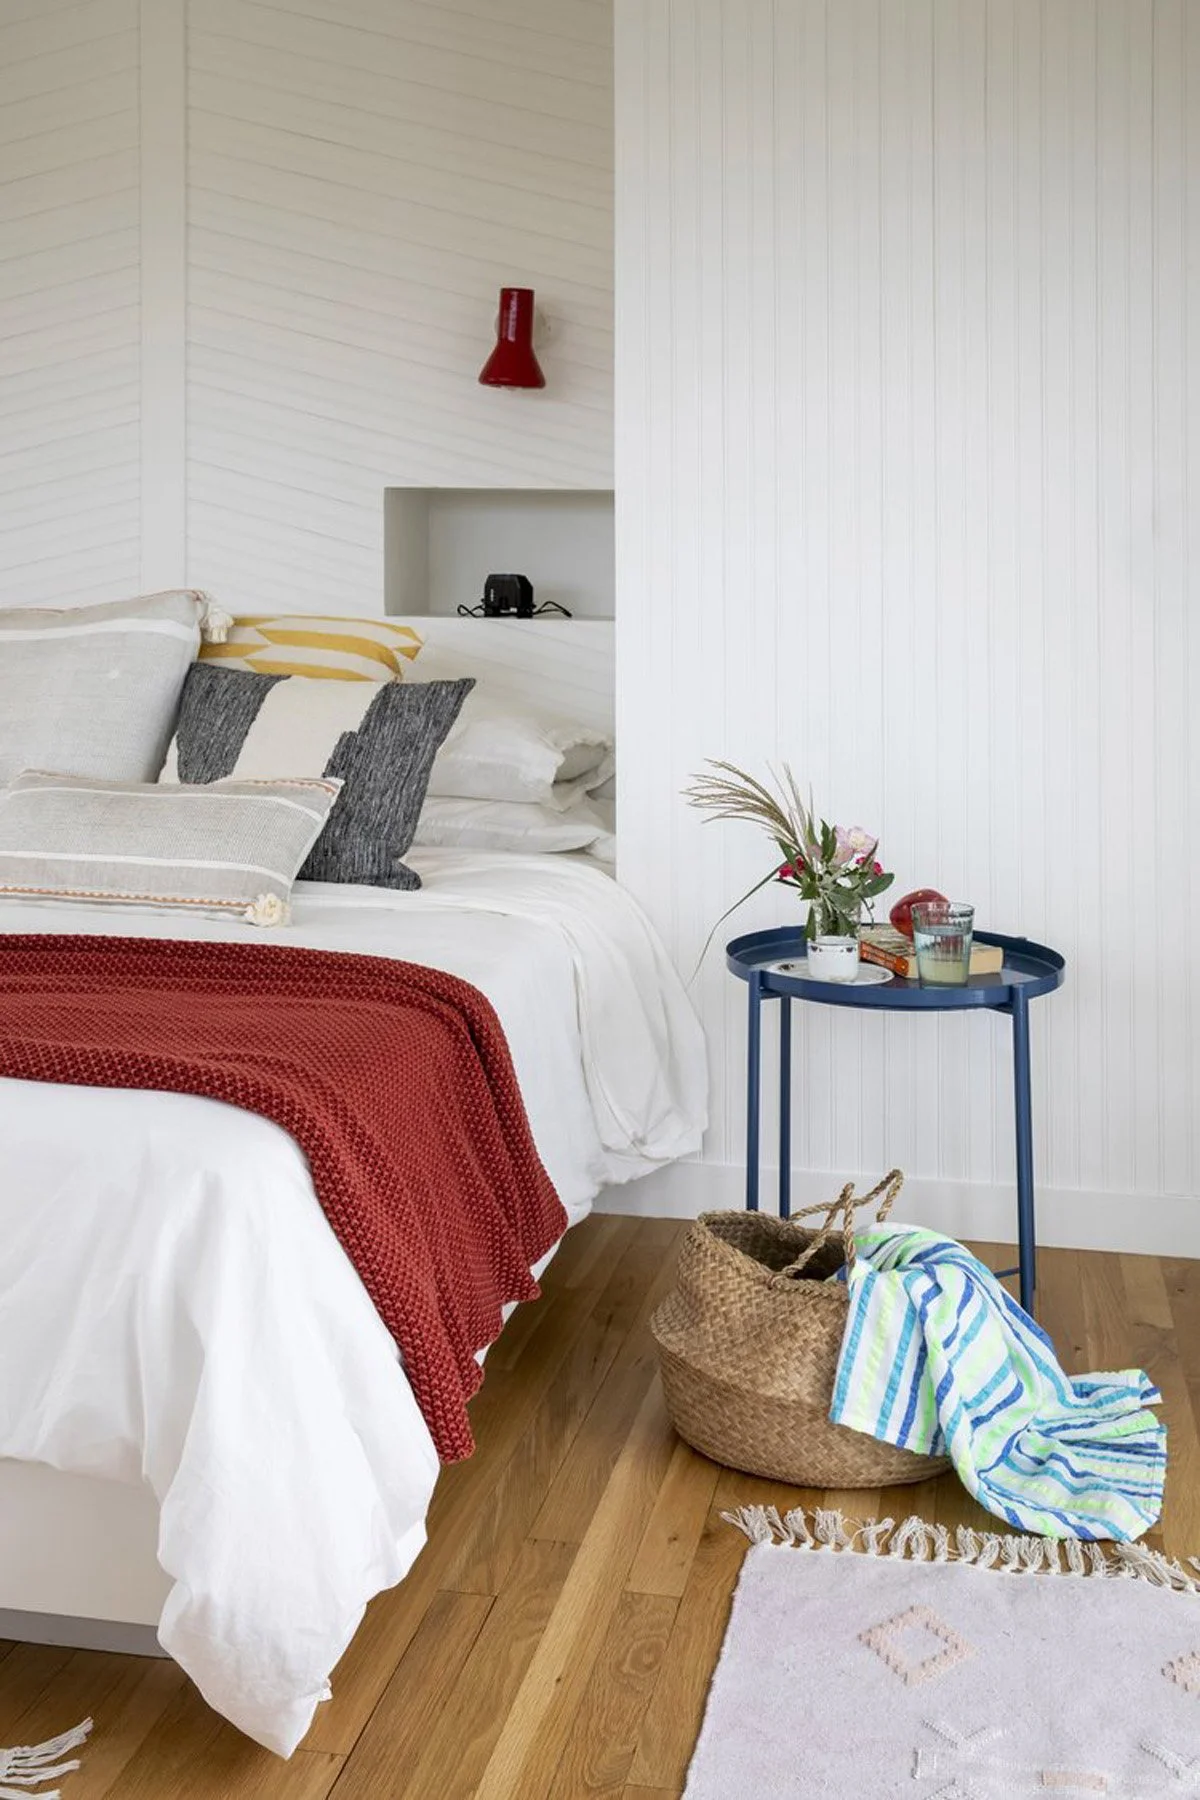
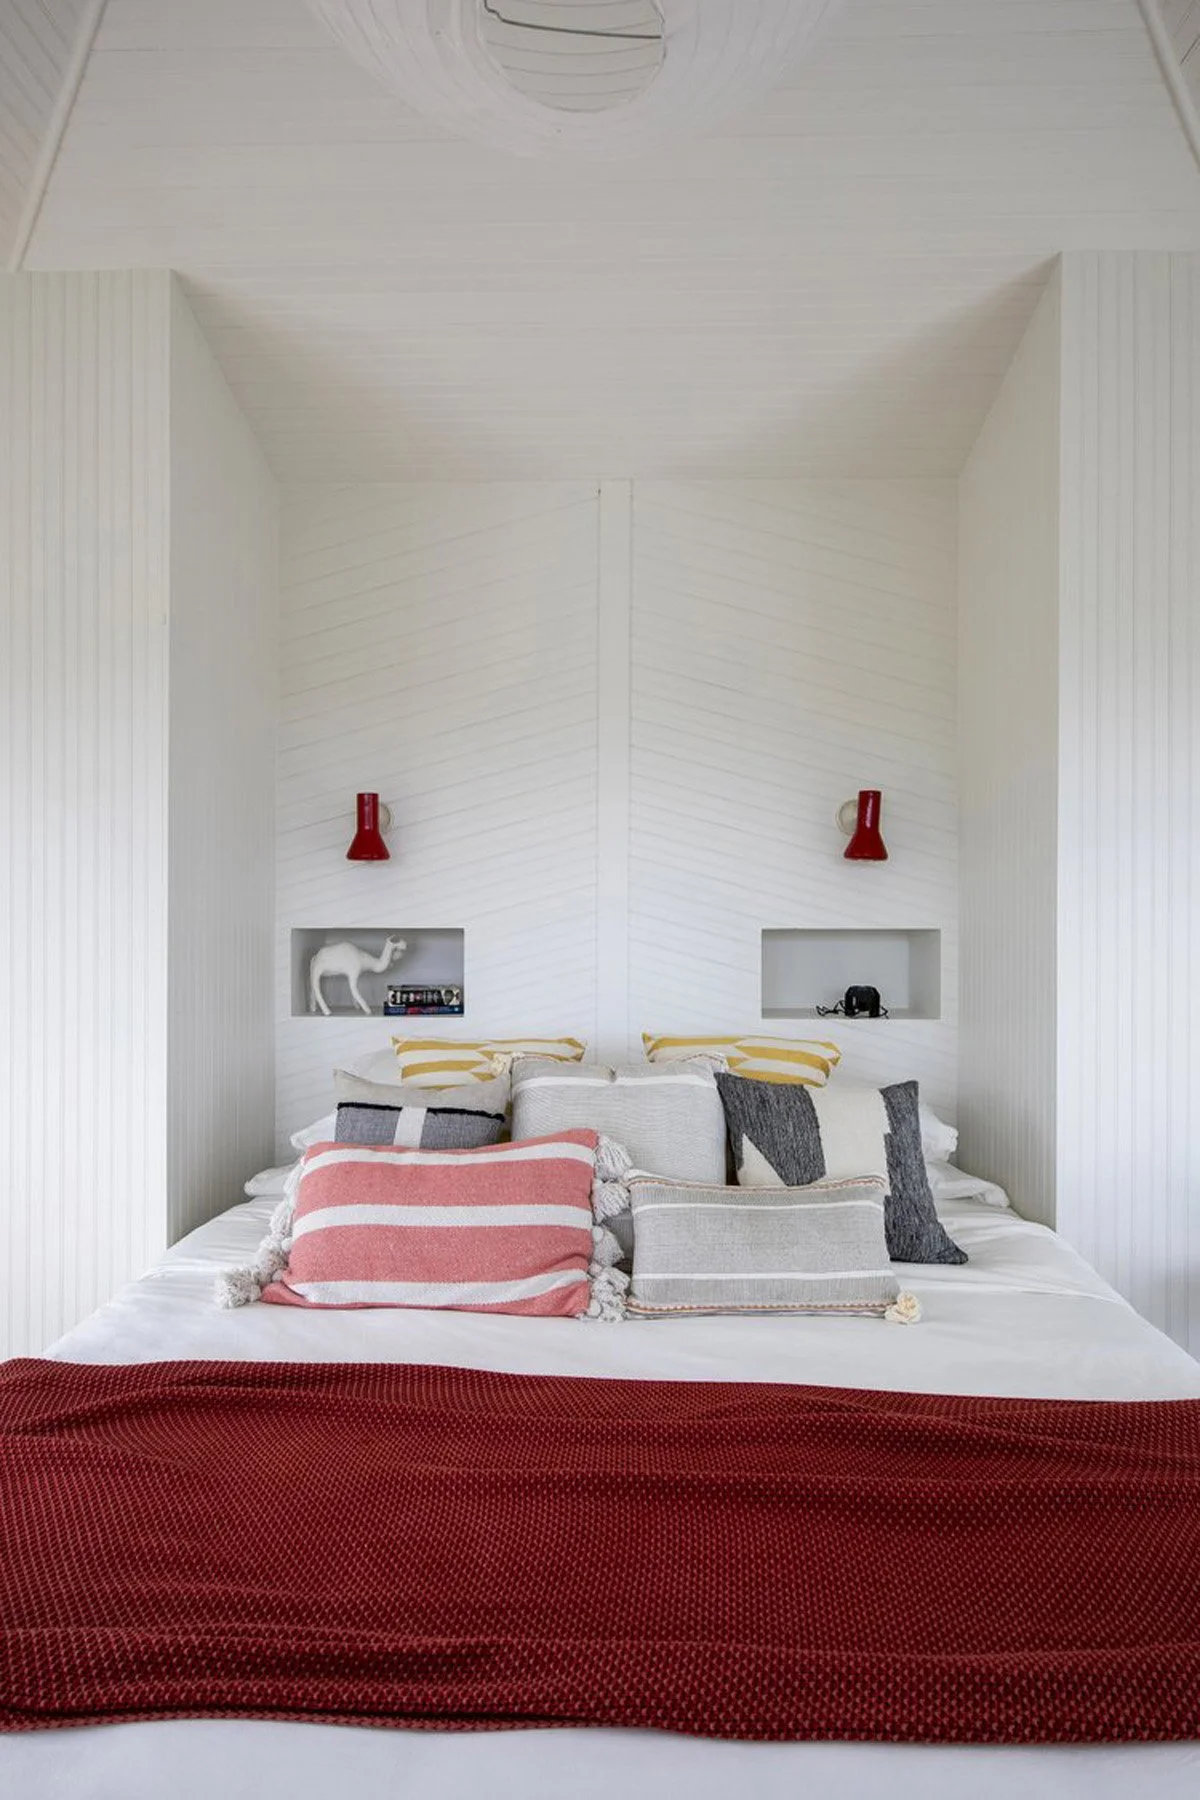
The Upstairs Loft
We carved the massive loft space into 3 distinct zones, while keeping the existing beadboard walls and ceiling; bedroom; closet and water closet.
The closet and water closet (toilet and sink only) were planned in conjunction with a built-in bed recess.
The bed area features windows on 3 walls; 2 balconies (one facing East and one West) and a lounge area.
The bed, lounge and shelving in the room are built-in to provide the ideal sizing for the furniture, prevent pieces from being shifted around and to provide a sense of permanence to the space.
Details That Matter
During demo, we uncovered the original linoleum. It had a great color and is a great material; We reintroduced linoleum to the space by outfitting the bathroom floor with a seamless sheet; providing a beautiful finish and durable barrier that will hold up.
The kitchen layout was driven by structural limitations. We worked around them instead of fighting them; with some crafty space planning we were able to double the size of the previous kitchen by integrating into the hallway. Our talented contractor allowed us to open up wall cavities and expand closet footprints (and built a lot of onsite specific millwork) that helped us utilize all the space we had available).
We kept a tight material palette. It helps the space feel calm, approachable and finished. The house is a stage and is there to support the homeowner whether it’s a quiet surfing weekend or a massive solstice party; the house can handle whatever is thrown its way.

The house isn’t big. It doesn’t need to be. Everything in it works. Every decision had a reason. That’s the kind of construction that lasts.
Coming Next Month:
Finishing Touches and Vintage Vibes
In Part 3 we’ll take a look at how we helped to pull the small space together using a combination of auction finds, the client’s own pieces and a few bespoke touches to help bring that effortlessly cool look to the house.
Stay tuned.
View the full project portfolio feature here.